Windshield Bracket
Posted: Fri Mar 05, 2010 5:18 pm
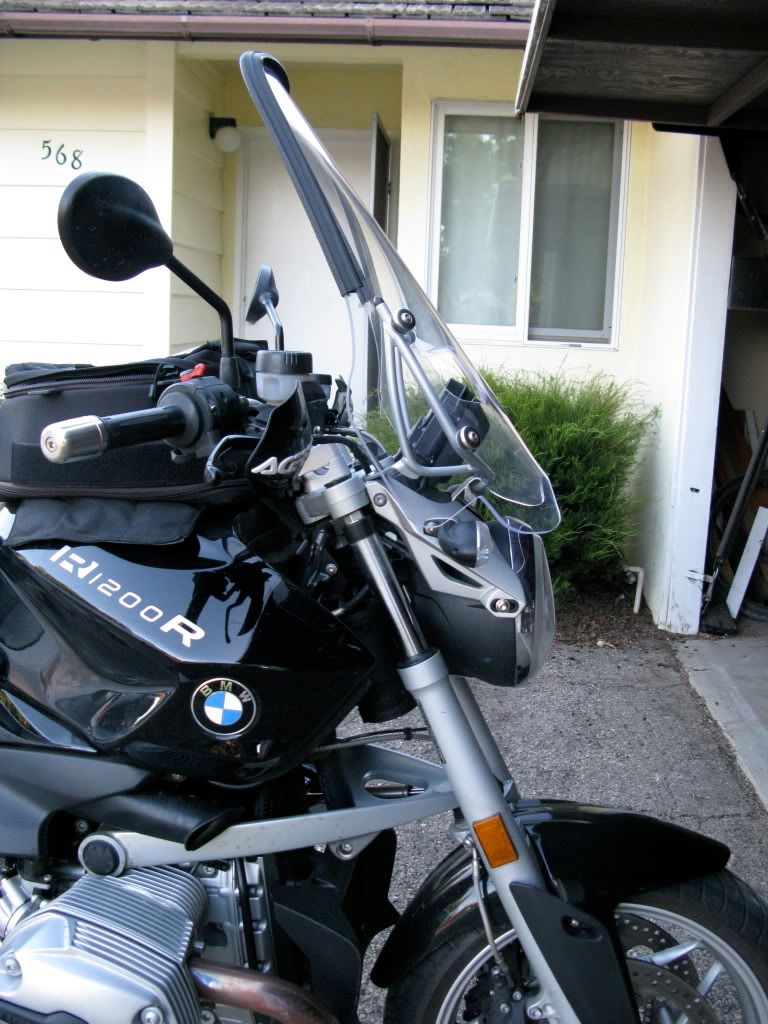
Exhaustive research of this forum suggests that satisfactory windshield performance can be obtained by installation of a bracket to lift the lower edge of the factory touring bracket in such a way as to tilt the shield backward. Several brands of shields have benefited from this treatment, including Cee Bailys and California Scientific. I chose the Cee Bailey's for esthetic reasons, and a sense that there were more satisfied Cee Baily's users than any other brand.
There are a couple of examples of simple brackets with an L-shaped bottom and a curved top to capture the OEM bracket. While this solution is quite simple, it has two drawbacks IMHO, 1) without some sophisticated bending equipment, it would be difficult to make up a pair of brackets that exactly matched; and 2) these brackets direct 100% of the force at the bottom of the windshield onto the fairly skimpy plastic tabs that serve to locate the plastic OEM foot. For these reasons, I chose to invent a spacer that would mimic the mounting and force distribution of the original bracket.
Ideally, I would have looked to have a piece machined from billet aluminum. ALternatively, it is possible to increase the length of the bottom loop of the touring bracket. However, unless you are in a position to do this by trial and error, you would need a very detailed model to give your welder.
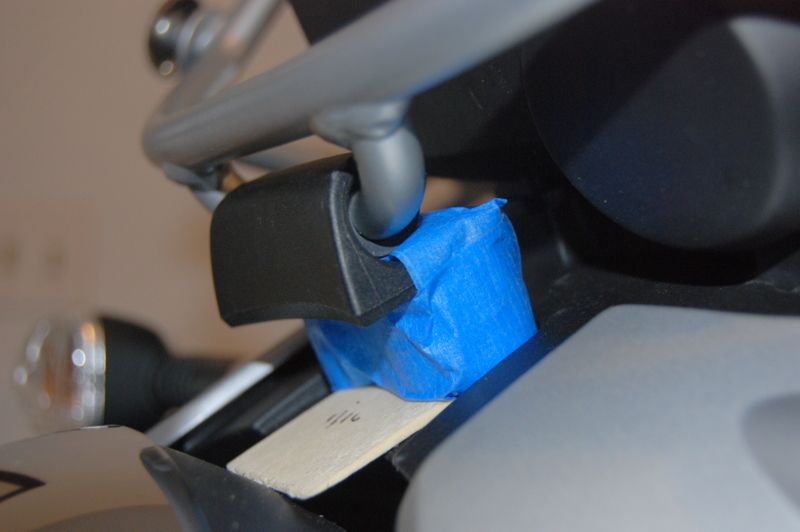
My first step was to make up a test mule that would tilt the OEM windshield bracket as far back as possible. The gating factor here is the back of the speedometer. With the bracket thus tilted, I attached a yard stick to the bracket, originating at the top of the headlight. My son held a level from my mouth to the spot where it intersected the yard stick, at the 23" mark. There not being a size 23, I opted for the size down, 22". I'm 5' 8" with a 29" inseam. However, when I'm sitting, I see eye to eye with folks 5' 10". I have the lowered comfort seat. All of these factors plugged into the Cee Baily's fitting guide indicated a 22" shield.
Here is the test mule: two 3/8" plastic spacers stacked and a white ceder shingle, held together with painter's blue masking tape. Height 13/16"
I was able to achieve the desired thickness using two pieces of 3/4" aluminum tubing and a piece of 1-1/2" x 1/16" bar stock. These were cut to size on my radial arm saw, using a blade for plastic and soft metal. An angle 3 dgrees from 90 degrees meant that my fabrication would fit neatly into the space in the headlight bracket. I cut a piece of 1" x 1/8" bar stock to fit on the bottom of my bracket shaped like the OEM plastic hook. This piece would serve to mimick the forces usually distributed by the plastic hook and keep the plastic pieces on the bike happy. I also found that the OEM bracket was not fitting as snugly on my fabrication as it had on the mule, so I added a strip of 1'8" thick aluminum across the bottom leading edge. A little grinding enabled this to fit the slope of the plastic it was mating to. All of these pieces of aluminum are held together with aluminum pop rivets, and a pair of 1-1/2" aluminum binder posts. All this aluminum came from Lowe's.
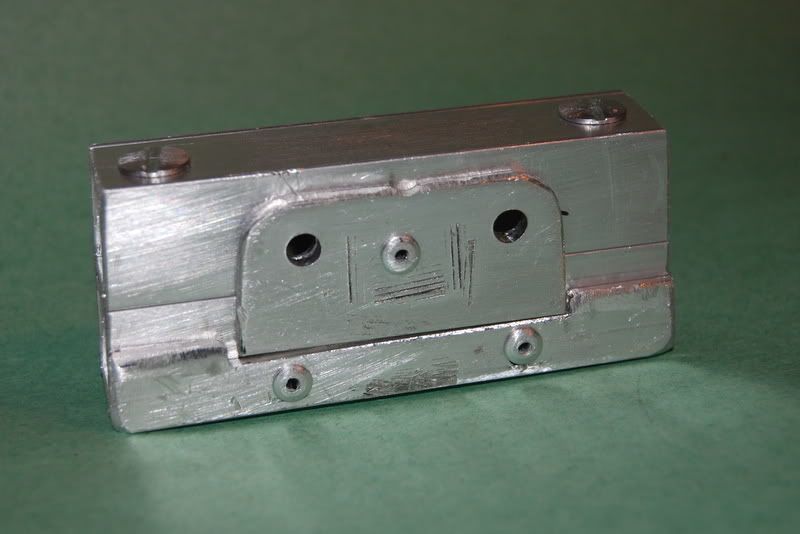
The top of my bracket, showing bolt holes and a small indent that fits a small tab on the OEM plastic bracket:
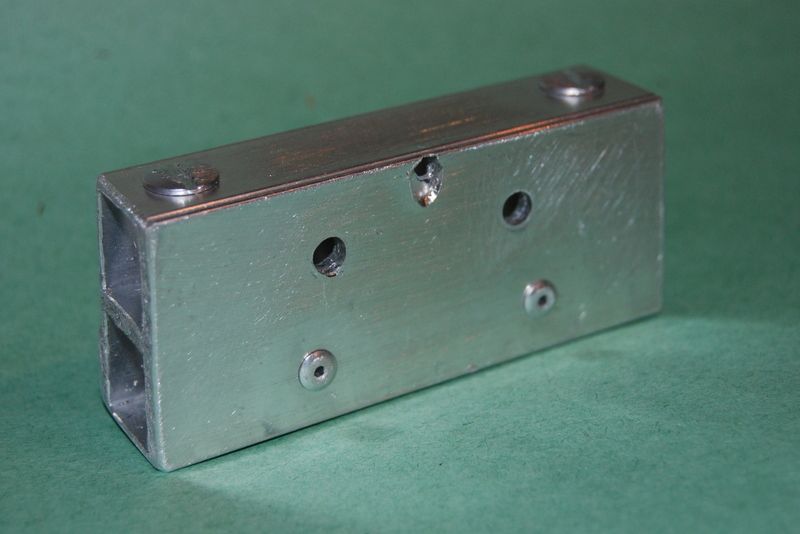
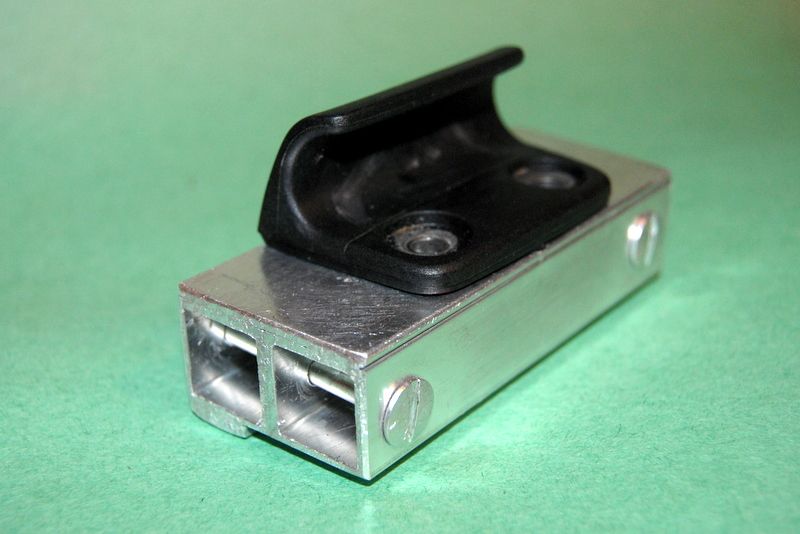
Bottom view of the bracket, built up to help the mounting bolts keep everything firmly in place:
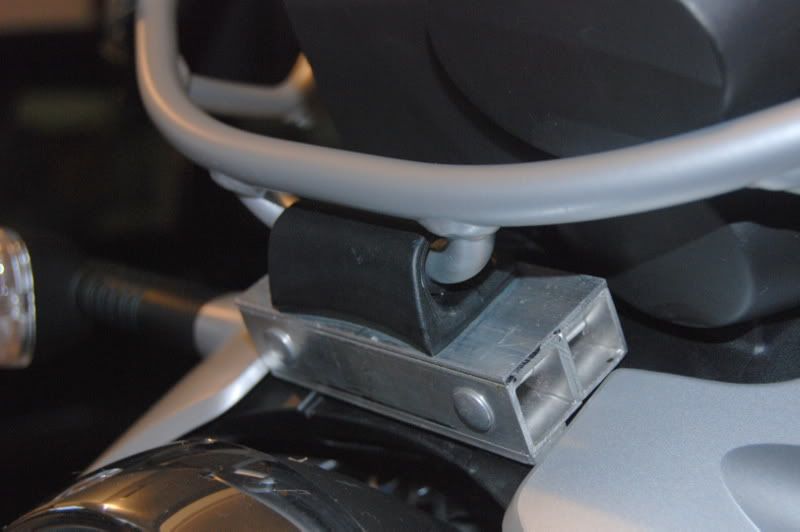
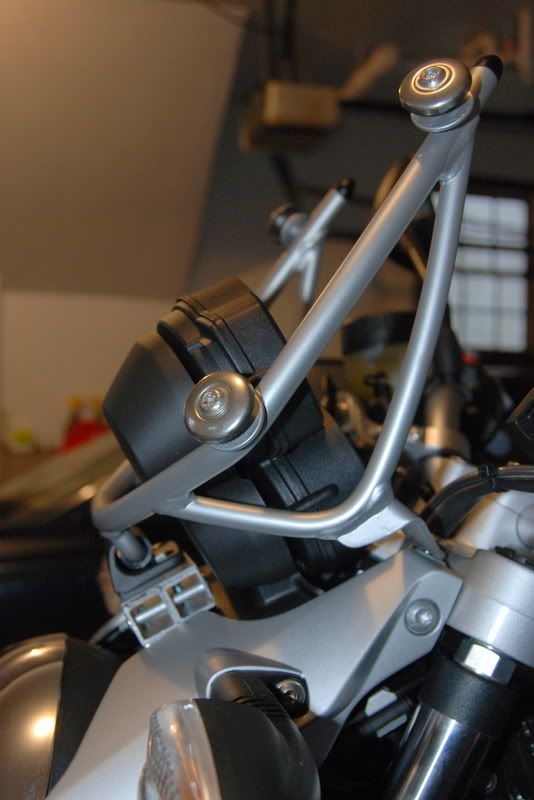
Here's a test fit:
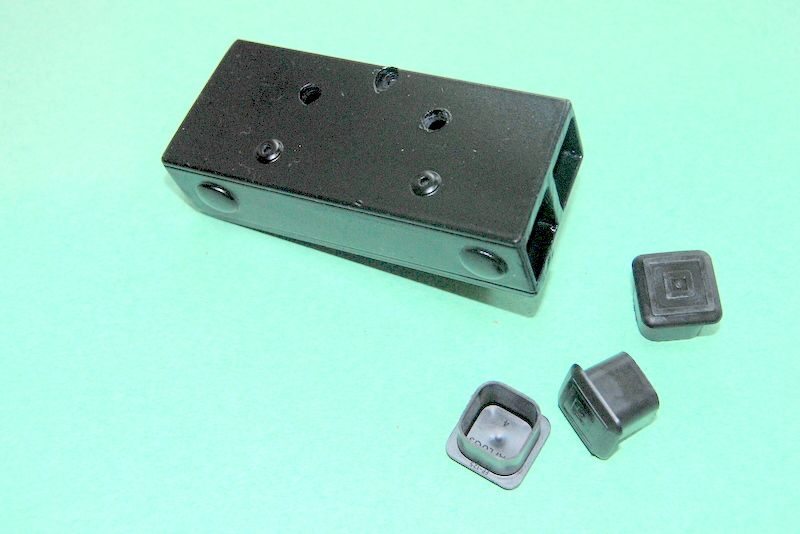
Here are the Ferguson Box and the OEM plastic hook, showing how they are the same from the motorcycle's perspective:
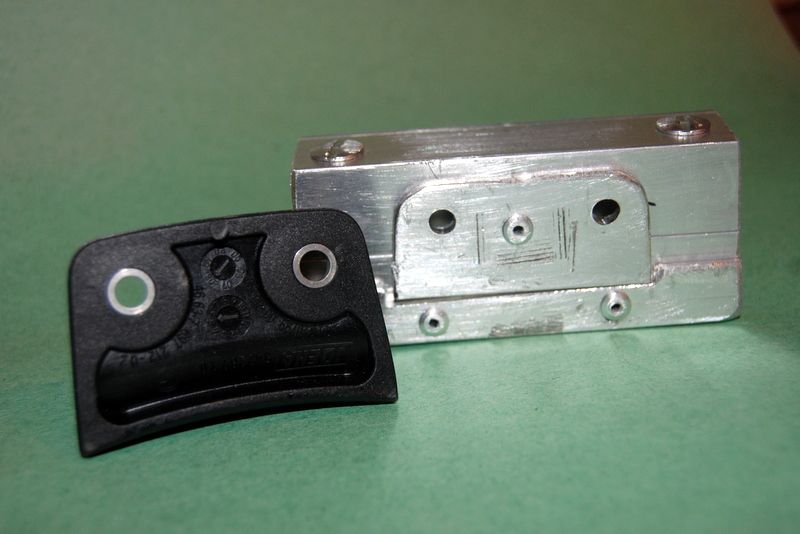
And here they are together:
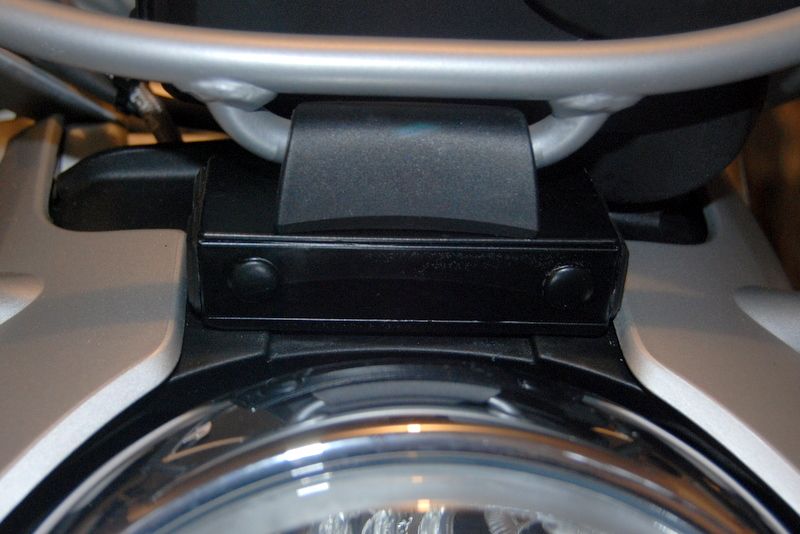
Test fit:
Looking pretty "rakish"
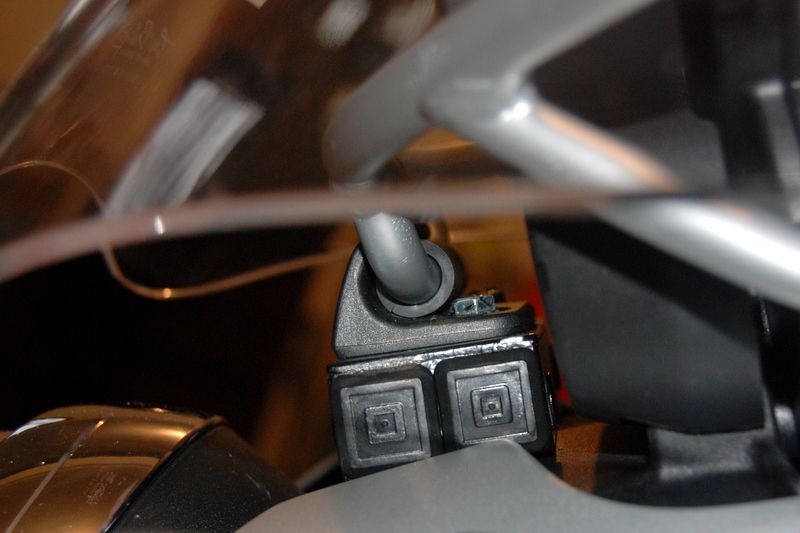
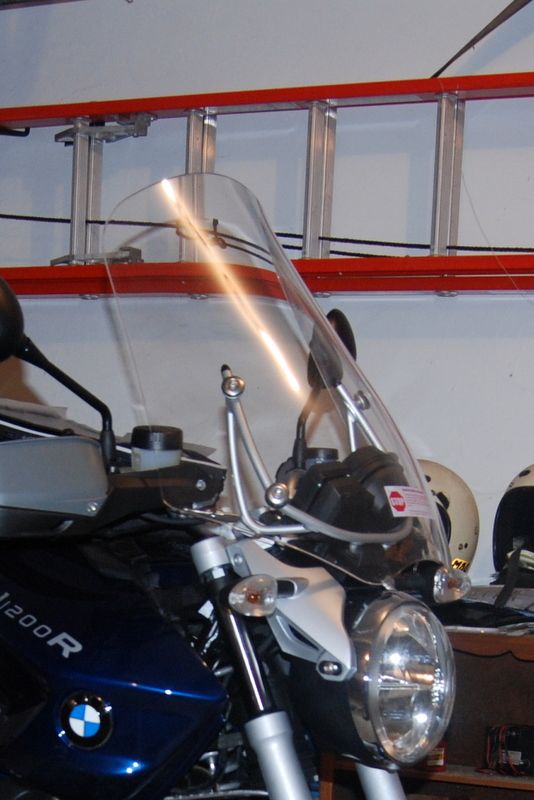
Test fit of the shield, notice how it leans back at a greater angle than the fork tubes. I also added 1/8" thick rubber washers under the bottom windshield mounts to further increase the rake. (Since doubled to two washers held together with some silicon):
[
A test ride at this point revealed mission accomplished. Acceptable wind in the face of up to 90 mph. No buffeting, even when passing large trucks. Sit up extra straight and get blasted with wind noise. Stand up into still air. Lean down and hide behind the shield when you get tired of the rain.
Time for some cosmetic considerations. Square tubing plastic plugs from McMaster Carr to fill in the ends and a coat of Krylon satin black to help the fabrication disappear into the bike:
All in all, a very gratifying result for minimal cost in time and materials. Still to report, installing GS hand guards and fabricating a fender extender. Stay tuned, now that I know how to do this picture posting...
Bruce
There are a couple of examples of simple brackets with an L-shaped bottom and a curved top to capture the OEM bracket. While this solution is quite simple, it has two drawbacks IMHO, 1) without some sophisticated bending equipment, it would be difficult to make up a pair of brackets that exactly matched; and 2) these brackets direct 100% of the force at the bottom of the windshield onto the fairly skimpy plastic tabs that serve to locate the plastic OEM foot. For these reasons, I chose to invent a spacer that would mimic the mounting and force distribution of the original bracket.
Ideally, I would have looked to have a piece machined from billet aluminum. ALternatively, it is possible to increase the length of the bottom loop of the touring bracket. However, unless you are in a position to do this by trial and error, you would need a very detailed model to give your welder.
My first step was to make up a test mule that would tilt the OEM windshield bracket as far back as possible. The gating factor here is the back of the speedometer. With the bracket thus tilted, I attached a yard stick to the bracket, originating at the top of the headlight. My son held a level from my mouth to the spot where it intersected the yard stick, at the 23" mark. There not being a size 23, I opted for the size down, 22". I'm 5' 8" with a 29" inseam. However, when I'm sitting, I see eye to eye with folks 5' 10". I have the lowered comfort seat. All of these factors plugged into the Cee Baily's fitting guide indicated a 22" shield.
Here is the test mule: two 3/8" plastic spacers stacked and a white ceder shingle, held together with painter's blue masking tape. Height 13/16"
I was able to achieve the desired thickness using two pieces of 3/4" aluminum tubing and a piece of 1-1/2" x 1/16" bar stock. These were cut to size on my radial arm saw, using a blade for plastic and soft metal. An angle 3 dgrees from 90 degrees meant that my fabrication would fit neatly into the space in the headlight bracket. I cut a piece of 1" x 1/8" bar stock to fit on the bottom of my bracket shaped like the OEM plastic hook. This piece would serve to mimick the forces usually distributed by the plastic hook and keep the plastic pieces on the bike happy. I also found that the OEM bracket was not fitting as snugly on my fabrication as it had on the mule, so I added a strip of 1'8" thick aluminum across the bottom leading edge. A little grinding enabled this to fit the slope of the plastic it was mating to. All of these pieces of aluminum are held together with aluminum pop rivets, and a pair of 1-1/2" aluminum binder posts. All this aluminum came from Lowe's.
The top of my bracket, showing bolt holes and a small indent that fits a small tab on the OEM plastic bracket:
Bottom view of the bracket, built up to help the mounting bolts keep everything firmly in place:
Here's a test fit:
Here are the Ferguson Box and the OEM plastic hook, showing how they are the same from the motorcycle's perspective:
And here they are together:
Test fit:
Looking pretty "rakish"
Test fit of the shield, notice how it leans back at a greater angle than the fork tubes. I also added 1/8" thick rubber washers under the bottom windshield mounts to further increase the rake. (Since doubled to two washers held together with some silicon):
[
A test ride at this point revealed mission accomplished. Acceptable wind in the face of up to 90 mph. No buffeting, even when passing large trucks. Sit up extra straight and get blasted with wind noise. Stand up into still air. Lean down and hide behind the shield when you get tired of the rain.
Time for some cosmetic considerations. Square tubing plastic plugs from McMaster Carr to fill in the ends and a coat of Krylon satin black to help the fabrication disappear into the bike:
All in all, a very gratifying result for minimal cost in time and materials. Still to report, installing GS hand guards and fabricating a fender extender. Stay tuned, now that I know how to do this picture posting...
Bruce