ABS service

Topics related to the ownership, maintenance, equipping, operation, and riding of the R1150R.

Moderator: Moderators

User avatar
iowabeakster
Quadruple Lifer
Posts: 1962
Joined: Mon Mar 21, 2005 5:43 am
Location: iowa city, ia

ABS service

Post by iowabeakster »

I am done with this beast! Just a few grammatical mistakes to go (I just keep finding them :lol: )...

Thanks to Cyclerob and jfslster98 for suggestions and added input! If anybody has some more suggestions, send me a message.

Legal Disclaimer: This posting is purely for entertainment and its purpose is to dissuade all people from considering doing their own ABS service. Improper service of the brake system can cause serious damage to man and machine. Any use of the below information for any other purpose is the sole liability of the person misusing the information. The author and R1150R.net are in no way responsible for any and all bad things that may happen from the misuse of information below.

Here are some highly recommended readings. They aren't R1150R specific, but they are the sources that I used to learn about this service.

http://users.rcn.com/dehager/service/service_abs3.pdf
http://www.beachbus.net/BMW/diy/Bleed_W ... rcuits.htm
http://www.beachbus.net/BMW/diy/Bleed_C ... ircuit.htm

This is how to make a filling adapter
http://users.rcn.com/dehager/service/ab ... dapter.pdf

I wanted to have a general outline for myself when I do this service. I wanted something that basically kept me on task, and served as a checklist so that I didn't forget anything. The check list (tacked to the wall, with a pencil on a string) will be in the garage with me as I do this service in the future. I could have avoided some minor hassles, if I had such a thing in the past. Below the outline I go into detail about most of the steps taken and provided many pictures. In my instructions, I include some things that are not in the above links, which I hope will be helpful to others. The more you know going into this service, the less likely there will be problems. Read all you can, then read it all again.

EDIT August 2010--

AN ALTERNATIVE PROCEDURE for SECTIONS II and III has been added on the second page of this thread. This ALTERNATIVE PROCEDURE for SECTIONS II and III is for people who have long exceeded the specified service interval and/or whose fluid has become excessively rotten. Not only are you hard on the motorcycle...but you are hard on "iowabeakster". You owe both the bike and "iowabeakster" a super sized value meal and a Pabst Blue Ribbon.

If your bike has been regularly serviced, ignore the ALTERNATIVE PROCEDURE for SECTIONS II and III on the next page, ENTIRELY! Just follow the instructions below.

If your bike has not been serviced regularly, DO NOT follow the instructions for sections II and III in the STANDARD PROCEDURE below. Instead, use the ALTERNATIVE PROCEDURE for SECTIONS II and III, on the next page. You risk serious damage to your ABS unit, if you use the standard procedure, and your bike really needs the added attention. You should follow the STANDARD PROCEDURE for section I. Then, follow the ALTERNATIVE PROCEDURE for SECTIONS II and III. Then again, follow the Standard Procedure for the remaining SECTIONS IV, V, and VI, to complete the job.


STANDARD PROCEDURE Outline:

I. Removing body panels and gas tank
-----A. Remove front and rear seat
-----------1. Remove headlight fuse, # 8
----- B. Remove luggage rack
----- C. Remove side panels
----- D. Remove oil cooler covers
----- E. Detach oil coolers from gas tank
----- F. Remove fuel line cover
-----G. Removing gas tank
-----------1. Remove tank bolt
-----------2. Swing oil coolers forward of gas tank
-----------3. Disconnect fuel pump wiring harness
-----------4. Disconnect two gas lines
-----------5. Disconnect two breather lines
---------- 6. Slide gas tank rearward and lift up

II. Flushing rear wheel circuit (done annually)
------A. Removing rear caliper and brake pads
-----------1. Remove rubber grommet holding wheel sensor wire
-----------2. Clip zip-tie
-----------3. Remove retaining clip
-----------4. Drive retaining pin out
-----------5. Remove two caliper bolts
-----------6. Lift caliper clear of rotor
-----*B. Cleaning caliper and pistons
-----------1. Remove carrier from caliper
-----------2. Extend pistons
-----------3. Clean pistons and caliper
------C. Rear wheel circuit flush
-----------1. Open reservoir
-----------2. Draw off old fluid
-----------3. Push pistons into caliper and wipe area clean
-----------4. Draw off fluid again
-----------5. Fill reservoir with fresh fluid
-----------6. Block pistons in caliper
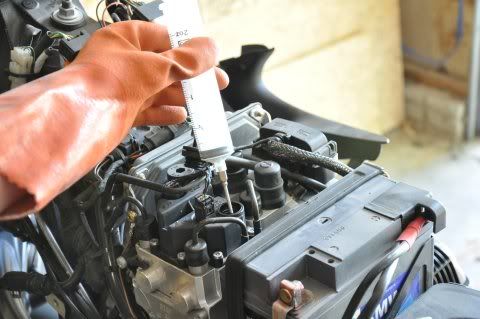
-----------7. Attach filling device and fill with fresh fluid
-----------8. Attach tubing to bleed nipple and open bleeder
-----------9. Turn on bike
-----------10. Operate rear brake pedal
-----------11. Flush until fluid is bubble free and brand new fluid is exiting nipple
-----------12. Close bleed nipple--7 nm
-----D. Clean pads and rotor with brake cleaner
-----E. Reinstalling rear caliper
-----------1. Replace carrier to caliper
-----------2. Replace brake pads
-----------3. Replace holding pin
-----------4. Replace caliper on rotor
-----------5. Torque caliper bolts--40 nm
-----------6. Replace retaining clip
-----------7. Replace rubber grommet for wheel sensor wire
-----------8. Replace new zip-tie
-----F. Checking fluid level
-----------1. Remove filling device
-----------2. Operate rear brake to extend pistons and set pads against rotor
-----------3. Final check of fluid level
-----------4. Close cap on reservoir

III. Flushing front wheel circuits (done annually)
------A. Open cap on reservoir and draw off excess old fluid
------B. Preparing left caliper
------------1. Remove caliper bolts
----------------a. Remove wire restraints holding brake line and wheel sensor wire
------------2. Slide caliper up and off the rotor
------------3. Remove retaining plate
------------4. Remove split pin and retaining pin
------------5. Remove brake pads
-----------*6. Clean caliper and pistons
-----------------a. Extend pistons
-----------------b. Clean pistons
-----------------c. Push pistons into caliper
-----------------d. Clean around seals
------------7. Block pistons in retracted position
------C. Preparing right caliper
------------1. Remove caliper bolts
------------2. Slide caliper up and off rotor
------------3. Remove retaining plate
------------4. Remove split pin and retaining pin
------------5. Remove brake pads
-----------*6. Clean caliper and pistons
-----------------a. Extend pistons
-----------------b. Clean pistons
-----------------c. Push pistons into caliper
-----------------d. Clean around seals
------------7. Block pistons in retracted position
------------8. Draw off excess old fluid from reservoir again
------D. Flushing the fluid--left side
------------1. Fill reservoir with fresh fluid
------------2. Attach filling device
------------3. Fill filling device with fresh fluid
------------4. Open bleed nipple--10mm
------------5. Turn on bike
------------6. Operate brake lever until fluid is bubble free and new fluid is exiting nipple
------------7. Close bleed nipple--9nm
------E. Flushing the fluid--right side
------------1. Fill filling device with fresh fluid
------------2. Open bleed nipple--10mm
------------3. Turn on bike
------------4. Operate brake lever until fluid is bubble free and new fluid is exiting nipple
------------5. Close bleed nipple--9 nm
-------F. Clean both sets of pads and rotors with brake cleaner
-------G. Reinstallation of both left and right calipers
------------1. Install pads and retaining pin
------------2. Replace split pin
------------3. Replace retaining plate
------------4. Replace calipers on rotors
------------5. Torque caliper bolts--30 nm
-------H. Setting fluid level
------------1. Remove filling device
------------2. Turn on bike
------------3. Operate brake several times to extend pistons and set pads against rotors
------------4. Final check on fluid level
------------5. Replace reservoir cap

IV. Flushing control circuits (done every 2 years)
------A. Remove Wiring harness from ABS module
------------1. Remove big plug
------------2. Remove sensor plugs
------------3. Cover plug holes with tape
-------B. Front circuits
------------1. Restrain front wheel
------------2. Remove cover and diaphragm to front reservoir
------------3. Draw off excess old fluid
------------4. Insert spray deflector
------------5. Fill with fresh fluid
------------6. Attach tubing to nipple #1 back of bike<<< Image >>>front of bike
-----------------a. Squeeze, open, close, release...repeat...
-----------------b. Keep reservoir full
------------7. Attach tubing to nipple #2
-----------------a. Squeeze, open, close, release...repeat...
-----------------b. Keep reservoir full
------------8. Attach tubing to nipple #3
-----------------a. Squeeze, open, close, release...repeat...
-----------------b. Keep reservoir full
------------9. Attach tubing to nipple #1 for a second time
-----------------a. Squeeze, open, close, release...repeat...
-----------------b. Keep reservoir full
------------10. Wipe clean diaphragm and replace reservoir cap and screws
---------C. Rear circuits
------------1. Remove cover and diaphragm to rear reservoir
------------2. Draw off excess old fluid
------------3. Fill with fresh fluid
------------4. Attach tubing to nipple #4 back of bike<<< Image >>>front of bike
-----------------a. pump, open, close, release...repeat...
-----------------b. Keep reservoir full
------------5. Attach tubing to nipple #5
-----------------a. pump, open, close, release...repeat...
-----------------b. Keep reservoir full
------------6. Attach tubing to nipple #6
-----------------a. pump, open, close, release...repeat...
-----------------b. Keep reservoir full
------------7. Attach tubing to nipple #4 for a second time
-----------------a. pump, open, close, release...repeat...
-----------------b. Keep reservoir full
------------8. Wipe clean diaphragm and replace reservoir cap
------------9. Replace caps on bleed nipples
------------10. Reattach ABS wiring harness

V. Double check everything!
--------A. Check tightness of all 9 bleed screws
--------B. Check tightness of all 4 reservoir caps and hoses on the ABS unit
--------C. Check attachment of ABS wiring harness (turn on bike for self-diagnostic, squeeze brakes for servos)
--------D. Check tightness of all caliper bolts
--------E. Replace rubber caps
--------F. Check those fluid levels in the ABS unit again

VI. Install gas tank and body panels--Installation is the Reverse of section I.

* The cleaning of the pistons is extra credit and does not necessarily need to be done annually. Although it may provide any OCD freak (misusing this information) with a great sense of satisfaction and accomplishment.


...much more to come...
Last edited by iowabeakster on Fri Feb 25, 2011 10:45 pm, edited 37 times in total.
I was dreaming when I wrote this, forgive me if it goes astray...
User avatar
iowabeakster
Quadruple Lifer
Posts: 1962
Joined: Mon Mar 21, 2005 5:43 am
Location: iowa city, ia

Re: ABS service

Post by iowabeakster »

Standard Procedure detailed instructions.

First big note...Brake fluid is very damaging to painted surfaces...Clean any spills up immediately. It would be advised to have a spray bottle of water and rags nearby for any spills and dribbles.

Second big note...Brake fluid is damaging to a person's kidneys and liver. It will be absorbed through the skin. Wear rubber gloves when working with brake fluid.

Put bike on the centerstand...

I. Removing body panels and gas tank

A. Remove front and rear seat

1. Remove headlight fuse, # 8
This is simply to make life easier on your battery, as you will be turning the bike on and using your brakes several times. #10 is an empty slot...a convenient place to keep it.
Image

B. Remove luggage rack
T40 for the big bolts (2)in the front, T30 for the smaller ones in the rear (4)

(added input from jfslater98) The luggage rack bolts are sometimes held in place with Locktite. So, some extra oomph may be needed, or some heat to make life easier. And be sure to use correct sized sockets/wrenches... these sizes are not commonly used around the rest of the bike.

I don't remember any Locktite on mine... or I don't know my own strength. If you are worried about bolts vibrating loose... use the low strength kind on installation. I've never lost any bolts and I don't use Locktite. Do what you feel.

Image


C. Remove side panels
The left side panel does not necessarily need to be removed. I recommend it is removed so that it is not damaged, especially when reinstalling the gas tank. All screws are T25's...4 for each panel. I am pointing at the screws that are underneath, the one above the charcoal canister is the worst.
Image

Here are the screws that attach the side panel to the gas tank. These screws are longer than the others. Notice the well nuts on the tank have a silver washers. Pay attention as these could fall out. These washers are present on all the well nuts on gas tank, as you will see shortly.
Image

Here are the two remaining ones...I am pointing at the ones for the left panel.
Image

Now, to remove the panel, slide the panel towards the front of the bike to release the nubby from the key hole.
Image

The fork pops off the frame.
Image

D. Remove oil cooler covers, from both sides of bike.
Two T25 screws on the bottom...
Image

Then lift the cover straight up. It is held on top by two nubbies pressed into rubber grommets.
Image

E. Detach the oil coolers from gas tank, on both sides of bike
One T25 screw on the bottom...
Image

Two T25 screws on the top. These two screws are shorter than the one on the bottom (and the two that hold the oil cooler covers).
Image

F. Remove fuel line cover.
One T25 screw with a silver washer...
Image

The fuel line cover also has a big nubby that inserts into a large rubber grommet.
Image

G. Removing gas tank...

1. Remove tank bolt completely.
T45
Image

2. Swing both oil coolers forward of gas tank.
Pull them out and around the front of the gas tank. There is not much room, but they will swing around the front. Pay attention to the bottom of the coolers and to the well nuts and don't lose the washers.
Image

3.Disconnect fuel pump wiring harness.
Image

4. Disconnect two gas lines with the quick disconnects.
Push thumb tabs to disconnect and pull straight apart. Notice my disconnects are upgraded to metal.
Special warning...The stock plastic ones can be easily broken. Have rag in place to catch fuel dribbles.
Image

5. Disconnect two breather lines.
Leave one coupler on the tank...the other on the bike. That makes incorrectly connecting them an impossibility.
Image

6. Slide gas tank rearward and lift up.
Put your hands in the middle of the tank, at the front and back edges, like pictured . This will keep you from banging the tank onto the bolt sticking up from the front strut. Slide the tank towards the rear of the bike and lift up.
Image

The bike should look like this...now we can actually start on the brakes...coming soon.
Image
Last edited by iowabeakster on Fri Feb 25, 2011 9:22 pm, edited 7 times in total.
I was dreaming when I wrote this, forgive me if it goes astray...
User avatar
iowabeakster
Quadruple Lifer
Posts: 1962
Joined: Mon Mar 21, 2005 5:43 am
Location: iowa city, ia

Re: ABS service

Post by iowabeakster »

Standard procedure continued...

II. Flushing rear wheel circuit (done annually)

People who are behind on service, skip to ALTERNATIVE PROCEDRUE for SECTIONS II and III on page 2 of this thread.

A. Removing rear caliper and brake pads

1. Remove the rubber grommet holding wheel sensor wire.
After the grommet is out of the small bracket...set it aside for safe keeping. It is split so it will come off of the wire. I leave the wheel sensor in place. This is because I don't like to remove it more than necessary. The sensor passes all the way through the final drive housing. Removing it will leave the final drive vulnerable to dust and dirt that could fall inside. The far side of the sensor is certainly covered with brake dust.
Image

2. Clip zip-tie...
Image

3. Remove retaining clip...
Neele nose pliers help with this... (very observant people will notice I got ahead of myself and removed the front caliper bolt in this picture)
Image

4. Drive retaining pin out
Use a drift pin, punch or any nail with a diameter smaller than the pin will work. A couple of taps with a hammer (pushing the pin towards the muffler)...and presto.
Image

5. Remove two caliper bolts, T45s

6. Lift caliper clear of rotor
Be careful not to bang the caliper against your beautiful wheels. It is suggested that painting tape (a.k.a. masking tape)be applied to the wheel so that the paint is not scratched. Since the retaining pin is already out, the pads will probably just fall out as the caliper clears the rotor. Maybe they won't...just be aware and be ready to catch them.
Image

I forgot to take a picture of the springy inside the caliper. Notice the arrow points in the direction of rotor spin. This might fall out, it is just held by small tabs. Just mount it back before putting the pads back in, with the arrow pointing the correct direction. Photo credit to Cyclerob.
Image

*B. Cleaning caliper and pistons
This does not need to be done annually. I did it the first time last year (bike 4 years old). But I liked it so much, I will do it every time. I hate the idea of pushing the dirty pistons inside the caliper (a few steps down the road). The first time it took a bit of scrubbing, this time it only took a few seconds. Brake fluid is a great solvent. If the grime is persistent, allow the fluid to dissolve the grime for a few minutes...then it will come off very easily. Below is a picture of a front caliper. It's the same idea for all the calipers. I forgot to take a picture of the rear. Notice the ring of grime on the pistons. This is what needs to be cleaned.
Image

1. Remove carrier from caliper...
Simply pull the carrier off the caliper, it slides on two greased shafts. Watch the small rubber dust boots, so they aren't damaged.
Image

2. Extend pistons...
Pump the brake pedal a few times, the pistons will move out. Do this with the bike off, using residual braking. If one piston is moving faster than the other, you can hold the faster moving one stationary with a couple fingers (unless you have very girly hands), then the other will extend. Don't push them out very far. Just pump them far enough, the ring of grime can be cleaned off.

3. Clean pistons and caliper...
A tooth brush and brake fluid is what should be used (DON"T USE ANY METAL BRUSH!). Use brake fluid as a solvent, just enough to wet the bristles on the brush a little bit (DON"T STICK YOUR DIRTY TOOTHBRUSH IN YOUR BOTTLE OF NEW BRAKE FLUID!). Cover the painted surfaces to avoid any fluid from spraying on them. Notice the strategically place rag. GLOVES ARE ON NOW, RIGHT?
Image

C. Rear wheel circuit flush...
Now we're actually going to flush some fluid!

1. Open reservoir
Note on the reservoir caps: The caps on the ABS unit are plastic. They are not very robust (I broke one over-tightening it my first time). I use a 8mm hex (thanks jfslater98) socket, with no ratchet. Finger tight on the socket is good enough to seal the rubber gasket, that is all you need to do. The older style ABS unit used a 19mm nut on the caps.
Image

2. Draw off old fluid
I use a big syringe. Some people use a turkey baster, I can't imagine that it could reach very far down the hole.
Image

3. Push pistons into caliper and wipe area clean
Pressing the pistons into the caliper requires no tools (unless there are other problems). Just hold the caliper in your palm and curling your fingers push in the pistons, it doesn't require all that much force.

4.Draw off fluid again
This is the same as step two and the last picture above. When the pistons were pushed into the caliper, it forced a little more old fluid up into the reservoir, suck it out.

5.Fill reservoir with fresh fluid
Inside the reservoir there is a white plastic crossbar. This has always been my mark for filling fluid in the reservoirs.
Image

6. Attach filling device and fill with fresh fluid
Most people use a filling device like this one available from Beemer Boneyard.
http://www.beemerboneyard.com/abs3funnel.html
They might make one themselves with the instructions below.
http://users.rcn.com/dehager/service/ab ... dapter.pdf
Or they might make one using various things and doodads. All serve the same purpose...to provide a extra large reservoir of fresh fluid as they use the servo motor to blow out the old fluid and pull in fresh stuff. Here is mine...pretty fancy huh? It is a (pink) baby bottle ($1.29 from Walgreens), a rubber band, and a piece of clear tubing connected to the nipple on the reservoir cap. The bottle rests on the intake snorkel and the rubber band holds the bottle stretched around rigid brake lines.
Image
If my type of setup is used, you will need to remove the black tubing from the nipple on the cap. The nipple has a barb holding the hose secure. I've already mentioned the fragility of the plastic caps. To avoid breaking the nipple off, slice the black tubing off with a utility knife, and the replace the tubing with new tubing when finished. The piece is only about 6 inches long and joins the "Y" connector just downstream.

I like my setup because I can stop the flush process whenever I want. If you have a "funnel on top", you can't remove the funnel until it is completely empty... or you'll have a mess.

Whatever type of filling device is used, install it, and fill with with fresh brake fluid.


7. Block pistons in caliper
The pistons were pushed all the way into the caliper in step #3 above. Now you want to hold those pistons in that position as you do the flush. Most people use a block of wood. I tend to use things that I have handy, as you will see in the picture for step 8.

8. Attach tubing to bleed nipple and open bleeder, 8mm
I am using the handle of a torx driver to block the pistons in the retracted position. Now, attach tubing to the bleed nipple on the caliper, and run the tubing into a can or something (bleed bag) where the used fluid will empty into. I use the catch basin that came with my Mityvac (not used in this procedure at all). In the picture, notice that I use a small clamp to help prevent any accidental "pop-offs" of the tubing from the nipple. That makes me mad when that happens. Now, open the bleed nipple. Gravity will start the flushing process. Notice the fluid filling the tubing. If you were extremely patient, you could let gravity do all the work. But...where's the fun in that? With my filling device, fresh fluid starts crawling from the baby bottle through the tubing into the reservoir, at the same time.
Image

9. Turn on bike
Now for the fun...

10. Operate rear brake pedal
Pressing the rear pedal will operate the servo motor. The servo pump provides a "power flush". This is something like a pressure bleeding system. The more the pedal is pushed, the faster the flush. Don't run out of fluid at the top! Keep an eye on your filling device.

11. Flush until fluid is bubble free and brand new fluid is exiting nipple
Then, release the brake pedal. It is easier to tell when new fluid is exiting the nipple if the old fluid is dark and yucky, but it is better if the fluid never gets rotten in the first place.

12. Close bleed nipple--tighten 7 nm (like you are able to get a torque reading on a bleed screw...don't break it)
Don't forget to turn off the bike, the clicking relay should help remind you. That was fun, huh?

D. Clean pads and rotor with brake cleaner
I spray the pads with aerosol brake cleaner. Then, I spray an (oil-free) rag with some more and wipe the rag on both sides of the rotor. A well ventilated area is strongly recommended.

E. Reinstalling rear caliper

1. Replace carrier to caliper
Remove the thing that was blocking the pistons in the fully retracted position. Be sure to press the carrier in far enough in that the rubber dust caps grab onto the opposing part.

2. Replace brake pads
Don't forget to replace the springy thing with the directional arrow, if it fell out. Install pads...

3. Replace holding pin
I don't pound the pin all the way in, yet. I wait until the caliper is back mounted on the final drive...like this.
Image

4.Replace caliper on rotor

5.Torque caliper bolts--40 nm

6.Replace retaining clip
Now pop that pin in fully, and put the retaining clip back on.

7. Replace rubber grommet for wheel sensor wire

8. Replace new zip-tie
That does it for the rear caliper.
Image

F. Checking fluid level
I've seen a couple of people who didn't do this part, and needed to remove the gas tank to add more fluid. That is a hassle, do the following steps to be sure that is not needed.

1. Remove filling device
If you are using a device like mine, open the reservoir one last time.

2. Operate rear brake to extend pistons and push the pads against the rotor

3. Final check of fluid level
Add a bit if necessary...

4. Close cap on reservoir

All done! (with this part :lol: )
Last edited by iowabeakster on Fri Feb 25, 2011 10:47 pm, edited 15 times in total.
I was dreaming when I wrote this, forgive me if it goes astray...
User avatar
iowabeakster
Quadruple Lifer
Posts: 1962
Joined: Mon Mar 21, 2005 5:43 am
Location: iowa city, ia

Re: ABS service

Post by iowabeakster »

III. Flushing front wheel circuit (done annually)
Doing the front wheel circuit is much the same as the rear, except that it must be done for both front calipers. The removal and disassembly of the front calipers is slightly different from the rear (details to follow). The process: remove/prepare left caliper...remove/prepare right caliper...flush left caliper...flush right caliper...install both...check fluid level. In order to keep this post size under control, I will only describe the removal/preparation/flushing of one caliper. Most of the pictures are from the right side (better lighting for photography). The instructions are the same for both calipers (except where noted).

A. Open reservoir cap on ABS unit and draw off excess old fluid
The reservoir for the front brakes is skillfully circled in red below.
Image

B. Preparing of left caliper
Note for the left side caliper: I also leave the front wheel senor in place (I hate the clips that hold the sensor wire, they are in an awkward place). Undo the plastic wire restraints on the mud guard so that the brake line is not bound to the sensor wire.
Image


1. Remove caliper bolts
Two T45s again, self-explanatory.

2. Slide caliper off the rotor
There is even less room to move the caliper off the rotor than on the rear. Be VERY careful not to bang up the paint on the wheels. Here, it is REALLY REALLY suggested that tape be applied to the wheel to protect it from scratching. Also, there is not much slack in the brake line, don't force anything. Once the caliper is slid to the outer edge of the rotor, it may seem that there is no way it will come off. It will. Tip the side of the caliper with the shiny retaining plate towards the outside (towards yourself) and keep wiggling slightly (always careful of the wheels).

3. Remove retaining plate
Two small 3mm hex bolts hold it on. The retaining plate is sprung (bent under pressure). When the first 3mm bolt is removed the plate will un-spring. Don't let this un-springing plate launch the small bolt. Now, loosen the other bolt.
Image

4. Remove split pin and retaining pin
Once the split pin is out...the retaining pin just slides out the outboard hole.
Image

5. Remove brake pads


*6. Clean calipers and pistons

a. Extend pistons
This is similar to the rear caliper. The only difference is that the calipers have 4 pistons. One pair of pistons can be blocked in place easily, with something like a screw driver handle. Then hold one of the other pistons with your fingers... and pump brake lever to extend the last one...the one you want to clean. Do this for all four pistons.
Image

b. Clean pistons
Oh, the satisfaction...
Image

c. Push pistons into caliper
Most of the old fluid should have been drawn out of the reservoir in the ABS unit (step A. above). Go ahead and push all four pistons into the caliper.

d. Clean around seals
Wipe out the interior of the caliper.

7. Block pistons in retracted position
On the front, I used wood blocks and shims to block the pistons. Here is a (not so good) picture of the left caliper, all ready for the flushing.
Image

C. Preparing right caliper
Now do the same thing again, on the right caliper. Except after the pistons are blocked...draw off whatever old fluid got pushed up into the ABS unit's reservoir.

Status: both calipers are off, clean, pistons retracted and blocked, old fluid (as much as can be) has been extracted from the reservoir...we are ready to flush.


D. Flushing the fluid--left side

1. Fill reservoir with fresh fluid
This is pretty much self-explanatory.

2. Attach filling device
Again, this is the same process as was done on the rear. Below, the reservoir for the front brakes is circled in red. Attach filling device to the cap circled in red.
Image

3. Fill filling device with fresh fluid
uhhh...don't spill...

4. Open bleed nipple--10mm
Yeah, a bigger wrench than the rear caliper used...but still the same idea. Once again, gravity will start the process.
Image

5. Turn on bike
Here comes the fun...

6. Operate brake lever until fluid is bubble free and new fluid is exiting nipple
A timed photo got this picture taken mid flush...exciting. I guess the thrill is probably gone. I know that the thrill of writing up this process is gone for me also.
Image

7. Close bleed nipple--9nm
Turn off the bike too.

GREAT NEWS--this is the 2/3s point of the first half of this procedure!!!

E. Flushing the fluid--right side
This is identical to the left side...re-read the above 7 steps again, if desired.

F. Clean both sets of pads and rotors with brake cleaner
Now all the wheel circuits are flushed and contain brand new fluid. Get out the aerosol brake cleaner and spray the pads. Spray some cleaner on a clean cloth, and wipe both sides of both rotors.

G. Reinstallation of both left and right calipers
Go ahead and remove the blocking you used to hold back the pistons.

1. Install pads and retaining pin

2. Replace the split pin

3. Replace retaining plate
Remember that this plate is sprung. Getting the second 3mm bolt in can be annoying.

4. Replace calipers on rotors
Careful of the painted wheels...start with the retaining plate tipped towards yourself (a bit) and roll the inboard pad over the edge of the rotor. This shouldn't be too hard because the pistons are still fully retracted.

5. Torque caliper bolts--30 nm

H. Setting fluid level

1. Remove filling device

2. Turn on bike
I use the ease of the servo motor, this time, to push out the pistons.

3. Operate brake several times to extend pistons and set pads against rotors

4. Final check on fluid level

5. Replace reservoir cap
That's it...that's the wheel circuit flush. The following part (control circuits) only needs to be done half as often!
Last edited by iowabeakster on Fri Feb 25, 2011 10:50 pm, edited 15 times in total.
I was dreaming when I wrote this, forgive me if it goes astray...
User avatar
iowabeakster
Quadruple Lifer
Posts: 1962
Joined: Mon Mar 21, 2005 5:43 am
Location: iowa city, ia

Re: ABS service

Post by iowabeakster »

IV. Flushing control circuits (done every 2 years)
If that wasn't enough...on with the control circuits. Some people replace the 6 bleed screws on the ABS unit with Speedbleeders (If somebody has some parts numbers, I would be happy to include them here). I haven't because I am cheap. I do it the old fashioned and painfully tedious way. We'll get to that in a minute.

A. Remove Wiring harness from ABS module
In order to access the 6 bleeders, the big ABS wiring harness plug must be removed.

1. Remove big plug
Stick a flat bladed screw driver into the plug as shown. Get it started by wiggling the screwdriver towards the rear of the bike. Once it's started you can pull it out with your fingers. Once it is all the way pulled back, be sure to lift the plug straight up...don't wiggle the plug as you don't want to bend the pins inside.

added input from jfslater98: From the factory, the big plug is tied down with zip ties. If it's the first time doing this, the zip ties should be removed, carefully! I did not do this and it made the whole procedure a lot more difficult than it needed to be. When you draw back the "Slide" for the big plug, it will click to let you know that it's ready to be removed. Don't yank on it until you've heard/felt that click.
Image

2. Remove sensor plugs
Now, there are two small plugs on each reservoir. I have always assumed that these are the sensors for the fluid level. But, I've been wrong before. Here, I marked one with black tape so that I know to replace them in their original places. (black tape for the rear)
Image

3. Cover plug hole with tape
To protect the pins, and to keep brake fluid out of the big hole, I cover it with tape. This is just me being me.
Image

B. Front circuits
For no particular reason I do the front circuits first.

1. Restrain front wheel
The reservoir on the handlebar will be opened up in just a second. To prevent any spillage, it is a good idea to restrain the handlebars (and front wheel) from swinging. The front wheel should be pointed straight ahead. Rope or straps can be used. Personally, I wedge several sheets of particle board under the front tire. I Really wedge those suckers in there. This also tips the bike back a bit, and gives a little more volume for the fluid in the front reservoir. Now any tiny bump of the handle bars won't send the fluid flying.

A suggestion from jflsater98: I used a small 2x4, wedging it in with a dead blow hammer. Seemed to work perfectly.
Image

2. Remove cover and diaphragm to front reservoir
Open the front reservoir, 4 Philips screws. The black rubber diaphragm might stay stuck to the cap, or it may stay in the reservoir (it may be inverted)... none of that matters. Just be careful for dribbles. Wipe it clean and set it aside with the cap and screws.
Image

Oh yeah, almost forgot...put a towel around the front of the reservoir for any potential dribbles.
Image

3. Draw off excess old fluid
Use the syringe (or turkey baster) to draw off old fluid. Special Warning Do not draw off so much fluid that the two holes in the bottom of the reservoir are exposed to the air. Getting air in those holes sucks. Don't do it. Make a mental note of the fluid level when the holes are just slighly covered with fluid. Don't ever let it drop below that level...KEEP THE HOLES COVERED WITH FLUID.

4. Insert spray deflector
This is a nice little trick to avoid squirting fluid out the small hole (this will happen, trust me) when squeezing the lever in a couple steps down the road. Put an ABSOLUTELY CLEAN utility knife blade in the reservoir.
Image

5. Fill with fresh fluid
Fill as much as can be filled (but don't over-fill it), and don't get it in the screw holes either.

6. Attach tubing to nipple #1 Image

The picture above is standing along the right side of the bike. The front of the bike is to the right...the rear of the bike is to the left.

This is the first of four flushes you will do for the front control circuit (Yes 4 flushes). Here's my set-up ready to go. The bleeders use a 7mm wrench (yes, a third size). There are some awkward angles for some of the bleed screws. One of those wrenches with an articulated head might be really helpful for a couple of the bleed valves. Some people have said that it was difficult to loosen the bleed screws. You might want to break them loose with a socket and ratchet or a flared wrench so that they are not stripped.
Image

a. Squeeze, open, close, release...repeat...
This is the most tedious thing ever. :(
With the tight quarters on the bleed valves, this is where I really recommend that a clamp is used to hold the tube on the valve. I also pack in towels around the area for dribbles that will occur when detaching the tubing.

Right hand on the brake lever... and left hand on the wrench....

First..........squeeze the brake lever...(slowly and never more than about half-way to the handle bar)
Second.......Open the bleed valve...(see the fluid come out in your tubing, you will also feel pressure drop on the lever)
Third........Close the bleed valve...(prevents sucking the fluid right back in)
Fourth.......release the brake lever(sllloooooowwwwlly)

Got it?.....good.... cause you're gonna do it more times than you can count. Repeat the 4 steps until fluid is bubble free and new fluid is exiting the bleeder...(you should know by now). The first bleed valve takes the longest. All the fluid in the reservoir and through the length of the brake line must be pushed out the first valve. The next three flushes don't take as long.

If one used speed bleeders...then it becomes just a matter of squeeze...release...squeeze...release. The check ball does the job of the open...close...open...close part of it.

b. Keep reservoir full
Keep an eye on the reservoir on the handle bar...don't let the two holes become exposed to air! Refill when it gets low. The capacity of the reservoir is not great, it will need to be refilled a good many times.

7. Attach tubing to nipple #2 Image

Here it is the set up for the second valve. I won't bother to show pictures for the other valves, it should be pretty clear after this.
Image

a. Squeeze, open, close, release...repeat...

b. Keep reservoir full

8. Attach tubing to nipple #3 Image

a. Squeeze, open, close, release...repeat...

b. Keep reservoir full

9. Attach tubing to nipple #1 (for a second time) Image

a. Squeeze, open, close, release...repeat...

b. Keep reservoir full

10. Wipe clean diaphragm and replace reservoir cap and screws
All right, all valves are purging brand new fluid now. Top up the reservoir. Clean the diaphragm again, and install diaphragm with the cap and screws.

a hint from jfslater98...Don't forget to remove your spray deflector!

C. Rear circuits
This is the same as doing the front circuits except that you will be using the foot pedal to do the pumping, and will be using the three valves that were not used on the front circuits. Here's the rear reservoir. There is a hole in the bottom. Guess what...don't let it get exposed to the air.
Image

1. Remove the cover and diaphragm to rear reservoir
Just screw off the black cap. Inside is another black rubber diaphragm (it may be stuck in the cap), it should be removed also.

2. Draw off excess old fluid
DON"T LET THE HOLE...ya know

3. Fill with fresh fluid

4. Attach tubing to nipple #4 Image

a. pump, open, close, release...repeat...
b. Keep reservoir full

5. Attach tubing to nipple #5 Image

a. pump, open, close, release...repeat...
b. Keep reservoir full

6. Attach tubing to nipple #6 Image

a. pump, open, close, release...repeat...
b. Keep reservoir full

7. Attach tubing to nipple #4 for a second time Image

a. pump, open, close, release...repeat...
b. Keep reservoir full


8. Wipe clean diaphragm and replace reservoir cap

9. Replace caps on bleed nipples
All right...almost home now.
I do something crazy. I hold a rag around each valve and blow some compressed air into the hole. The rag catches the fluid spray. The little bit of fluid in those valves freaks me out. I do this on the bleeders on the calipers too. If you try this madness, don't use a lot of air pressure and be sure the rag will catch the spray so that it won't fly in your face or all over the place.

10. Reattach ABS wiring harness
Don't wiggle as you put the big plug in place, remember all of those pins need to go perfectly into those tiny little holes. Pushing the tab in simultaneously as you push the plug down works the best. Go slowly. Replace the small electrical plugs on the reservoirs.

Hint from jfslater98: You actually don't need to push down on anything. Just make sure the "slider" is all the way out. Gently place the big plug on the socket. Press in on the slider (horizontally) and the plug will guide itself down into the socket, all the way home. Shockingly simple after all the machinations you've just been through.

V. Double check everything!
--------A. Check tightness of all 9 bleed screws
--------B. Check tightness of all 4 reservoir caps (and hoses on the ABS unit)
--------C. Check attachment of ABS wiring harness (turn on bike for self-diagnostic, squeeze brakes for servos)
--------D. Check tightness of all caliper bolts
--------E. Replace rubber bleeder caps
--------F. Check the fluid levels in the ABS unit, you don't want to have to pull the tank off again to add some.

Super Suggestion from jfslater98: Before you button up the body panels, consider flushing the clutch was well. It also uses DOT4 fluid, you have the right side panel off, and you're supposed to do this annually anyway.


VI. Install gas tank and body panels--Installation is the Reverse of section I.
When putting the tank back on, be aware of the breather lines, fuel lines, and wiring harness so that they are not crimped and they are where they need to be as the tank is lowered into place. Make sure the round rubber (tractor tires) are in the appropriate channels on the underside of the tank.


Use a bit of Vaseline reconnecting the fuel lines.

Now give your bike a test ride, very slowly...
Then give it a thorough cleaning.
Last edited by iowabeakster on Thu Feb 24, 2011 9:54 pm, edited 11 times in total.
I was dreaming when I wrote this, forgive me if it goes astray...
User avatar
harveyrawn
Basic User
Posts: 203
Joined: Tue Sep 30, 2008 3:50 pm
Donating Member #: 0
Location: Somis, Southern California

Re: ABS service

Post by harveyrawn »

I really appreciate your excellent write-up and photos. I'm about to perform a complete ABS service on my '02 for the first time. Your information will be a great help.

Many thanks.
Harvey
Recharged on an '02
User avatar
iowabeakster
Quadruple Lifer
Posts: 1962
Joined: Mon Mar 21, 2005 5:43 am
Location: iowa city, ia

Re: ABS service

Post by iowabeakster »

harveyrawn,

My bike is an '04. There wil be a couple small differences for the '02 bikes, like the caps on the reservoirs, and removal of the front brake pads. Be sure to check out links at the top...I think they were done on bikes before the small changes were made.

If you find something that would be helpful to others...post it here. Or you could send me a PM and I could add/edit the information above.

My best advice is to take it step by step...and take a couple breaks. The only times I really got frustrated with the service is when I started rushing... that's when I do something stupid like run out of fluid in a reservoir...or forget to block the pistons in one of the calipers. Mistakes like those add considerably to the amount of time it takes. That's precisely why I wanted a general outline for myself that serves as checklist.
I was dreaming when I wrote this, forgive me if it goes astray...
User avatar
jfslater98
Quadruple Lifer
Posts: 490
Joined: Thu Sep 15, 2005 11:20 am
Donating Member #: 535
Location: Northern NJ

Re: ABS service

Post by jfslater98 »

Awesome write-up IB. Wished I had this thorough guide when I struggled through it this past winter. That #1 circuit on the pump, the one closest to the Motronic (?), still makes me break out in cold sweats thinking about it. On top of being in a real awkward location, it was tightened down so heavily, that I watched the bolt begin to melt as I tried to twist it open. It all worked out though, no faults and the bike brakes great.

One tip I would add, from painful experience. You noted the space is real tight for the calipers on the front wheels. Put some painters tape on the wheel prior to pulling the calipers off. I figured that one out... the 2nd time I had to take the calipers off. :cry:
Gone but not forgotten: 2004 Orange Rockster
User avatar
iowabeakster
Quadruple Lifer
Posts: 1962
Joined: Mon Mar 21, 2005 5:43 am
Location: iowa city, ia

Re: ABS service

Post by iowabeakster »

jf,

The tip about the tape has been added to the detailed instructions...thanks.
I was dreaming when I wrote this, forgive me if it goes astray...
User avatar
bubbac45
Basic User
Posts: 28
Joined: Thu Feb 14, 2008 7:32 pm

Re: ABS service

Post by bubbac45 »

Brilliant writeup and photos.
Now I have the courage to do my 2004roc
Thanks for your patience and perseverence.
You have made this procedure very clear.
Cheers
Chris
User avatar
hank
Basic User
Posts: 282
Joined: Sun Oct 15, 2006 5:30 pm
Donating Member #: 0
Location: On the Lost Highway, Scotland.
Contact:

Re: ABS service

Post by hank »

Thanks for taking the time to do this write up. I have no excuse for putting this job off now, except I just looked out the window and the sun is shining so maybe I'll just go for a ride today.


Hank.
I'm a rollin stone all alone and lost...............
User avatar
Dr. Strangelove
Double Lifer
Posts: 1996
Joined: Sun Aug 07, 2005 2:40 pm
Location: #488Livin' in a Poor Man's Shangri.La

Re: ABS service

Post by Dr. Strangelove »

Remarkable write-up.

Best description of removing the tank I have seen. By far.

Can't comment on the fluid/ABS part because I haven't done that, but it is very clear to me that I do not want to do it.

Pictures and step by step instructions make this an instant classic.

Great job, but you omitted a step that you obviously took....
Step One: Make the bike immaculate

thanks

John
'09 Schwarze Blanche DuBois
Well, don't do that-Hippocrates
User avatar
owldaddy
Lifer
Posts: 2104
Joined: Fri Mar 18, 2005 1:56 pm
Donating Member #: 0
Location: Bay area Ca.

Re: ABS service

Post by owldaddy »

Your timing for writing this couldn't have been better from my perspective. I'm about to attempt this chore soon. I'm about to do the 36,000 mile maintenance, and plan to have the bike apart for a lot of stuff, including a new battery, the original is about to croak. Anyway I'm rambling, I just wanted to say thanks, I appreciate your effort in writing this. I'll be printing it up and have a copy in the garage.
Don
2004 Ferro R1150R the stealthiest color
When everything's coming your way, you're in the wrong lane.
Boxer04
Basic User
Posts: 44
Joined: Tue Feb 28, 2006 5:31 am
Donating Member #: 0
Location: Brisbane, Australia

Re: ABS service

Post by Boxer04 »

This write up is excellent and will be of great service to those who like to do their own work. I did my full bleed/fluid change a few months ago. My advice is simple - the precess is broken into stages so turn the rodio off in the shed; concentrate on the stage you are at and take ...your... time. It is not possible to stop this job part way through. If you haven't got time to add a bit of space for thinking and looking then start the job another day. Remember slow movement on the hand lever/foot lever greatly minimises the risk of air intrusion. At the end of the process you should have rock hard levers when the brake is applied (with the ignition off)
BoxerFan
'04 R1150R
Member #588
User avatar
rdsmith3
Lifer
Posts: 2632
Joined: Mon Mar 21, 2005 9:53 am
Donating Member #: 74
Location: Flanders, NJ

Re: ABS service

Post by rdsmith3 »

Great write-up! thanks
Bob
2002 Atlanta Blue
Lifetime Member #74
popsnicker
Basic User
Posts: 12
Joined: Mon Jun 01, 2009 9:54 am

Re: ABS service

Post by popsnicker »

Thank you so much for this! I just paid the dealer $200 to do the complete flush, I think I can handle it next time now :D
User avatar
rdsmith3
Lifer
Posts: 2632
Joined: Mon Mar 21, 2005 9:53 am
Donating Member #: 74
Location: Flanders, NJ

Re: ABS service

Post by rdsmith3 »

Did you use a tripod for the camera?
Bob
2002 Atlanta Blue
Lifetime Member #74
User avatar
iowabeakster
Quadruple Lifer
Posts: 1962
Joined: Mon Mar 21, 2005 5:43 am
Location: iowa city, ia

Re: ABS service

Post by iowabeakster »

Thanks for all compliments. The grattitude makes the time spent worthwhile. Although, since the stated purpose was to scare everybody away from doing this themselves... I must consider it a total failure. ;)

Boxer04,

I totally agree with your advice. Do not try to race the clock. I really do reccommend that people read the other write-ups that are linked at the top too. This will not be a quick job, especially the first time doing it. I've done it a number of times (before this time), and made a couple of forehead-slapping mistakes. The mistakes were not significant, just the type that require me to do a part of it a second time (and helped to write a better instructional post). Mostly they were the result of forgetting the smallest step (because of rushing!). The write-up does not show the amount of time all of this takes, and this write-up will not make this service goof-proof. I hope anyone who does this has at least done a traditional brake bleed before. It's not much different, it just has a great many more steps. All of those small steps add a mistake potential.

That's why I wanted the outline for myself... which will be tacked to the garage wall, along with a pencil on a string. I call it "Shade Tree Risk Management".


Bob,

Yep, I used a tripod and operated the camera with a ten second timer.

John,

I thought about cleaning up the bike before taking pictures...but it just rolls out of bed that pretty. I give it a cleaning "under the hood" after every service is done though.

I hope to have my masterpiece completed for you soon... :^o

Pre-harvest service on a STS 9660
Image
I was dreaming when I wrote this, forgive me if it goes astray...
User avatar
jfslater98
Quadruple Lifer
Posts: 490
Joined: Thu Sep 15, 2005 11:20 am
Donating Member #: 535
Location: Northern NJ

Re: ABS service

Post by jfslater98 »

iowabeakster wrote:Do not try to race the clock. I really do reccommend that people read the other write-ups that are linked at the top too. This will not be a quick job, especially the first time doing it.
+1. If it's your first time, read all the materials you can get your hands on regarding this procedure. Read them again. Start collecting the materials you'll need to perform this service.

Have some breakfast/lunch/dinner. Take a ride/walk/something else. Read them again. Decide which one will be your guide, or maybe put one together if you need to. Read THAT again...

Basically, get to the point where you think you can do it from memory. Make sure you have all the parts ready. Then commit a full day to performing the procedure. Yes, a full day, it's your first time, and you will run into problems. Thus requiring you to... read everything again.

This is from someone who has no professional mechanical experience, and did this flush once, this past December. Successfully. Rock hard brake levers, no ABS and no trips to the dealer. =D> The only mistake I made was adding too much brake fluid to the front resevoir, thus causing some weeping.

The tank has to come off, so ideally you can replace the fuel filter (and Quick Disconnects, if you haven't done that yet), while doing this. But you don't have to. You can do this part of the service some other time, when the load of fuel is nice and low. Ironically, I had waaaay more problems with the fuel filter than I did with the ABS bleed. But as I mentioned above, I had "over-prepared" because I assumed that was going to be the troublesome part of the 24K service.
Gone but not forgotten: 2004 Orange Rockster
motojoe
Basic User
Posts: 20
Joined: Sun Mar 14, 2010 3:36 pm

Re: ABS service

Post by motojoe »

I finally got around to Joining this excellent online brain trust.
I PM'd Iowabeakster, but decided to make a more public appeal for help as well.
How do you remove the wheel circuit resevior caps on a '04 RR? The front one is really the problem.
Thanks
Joe
Post Reply